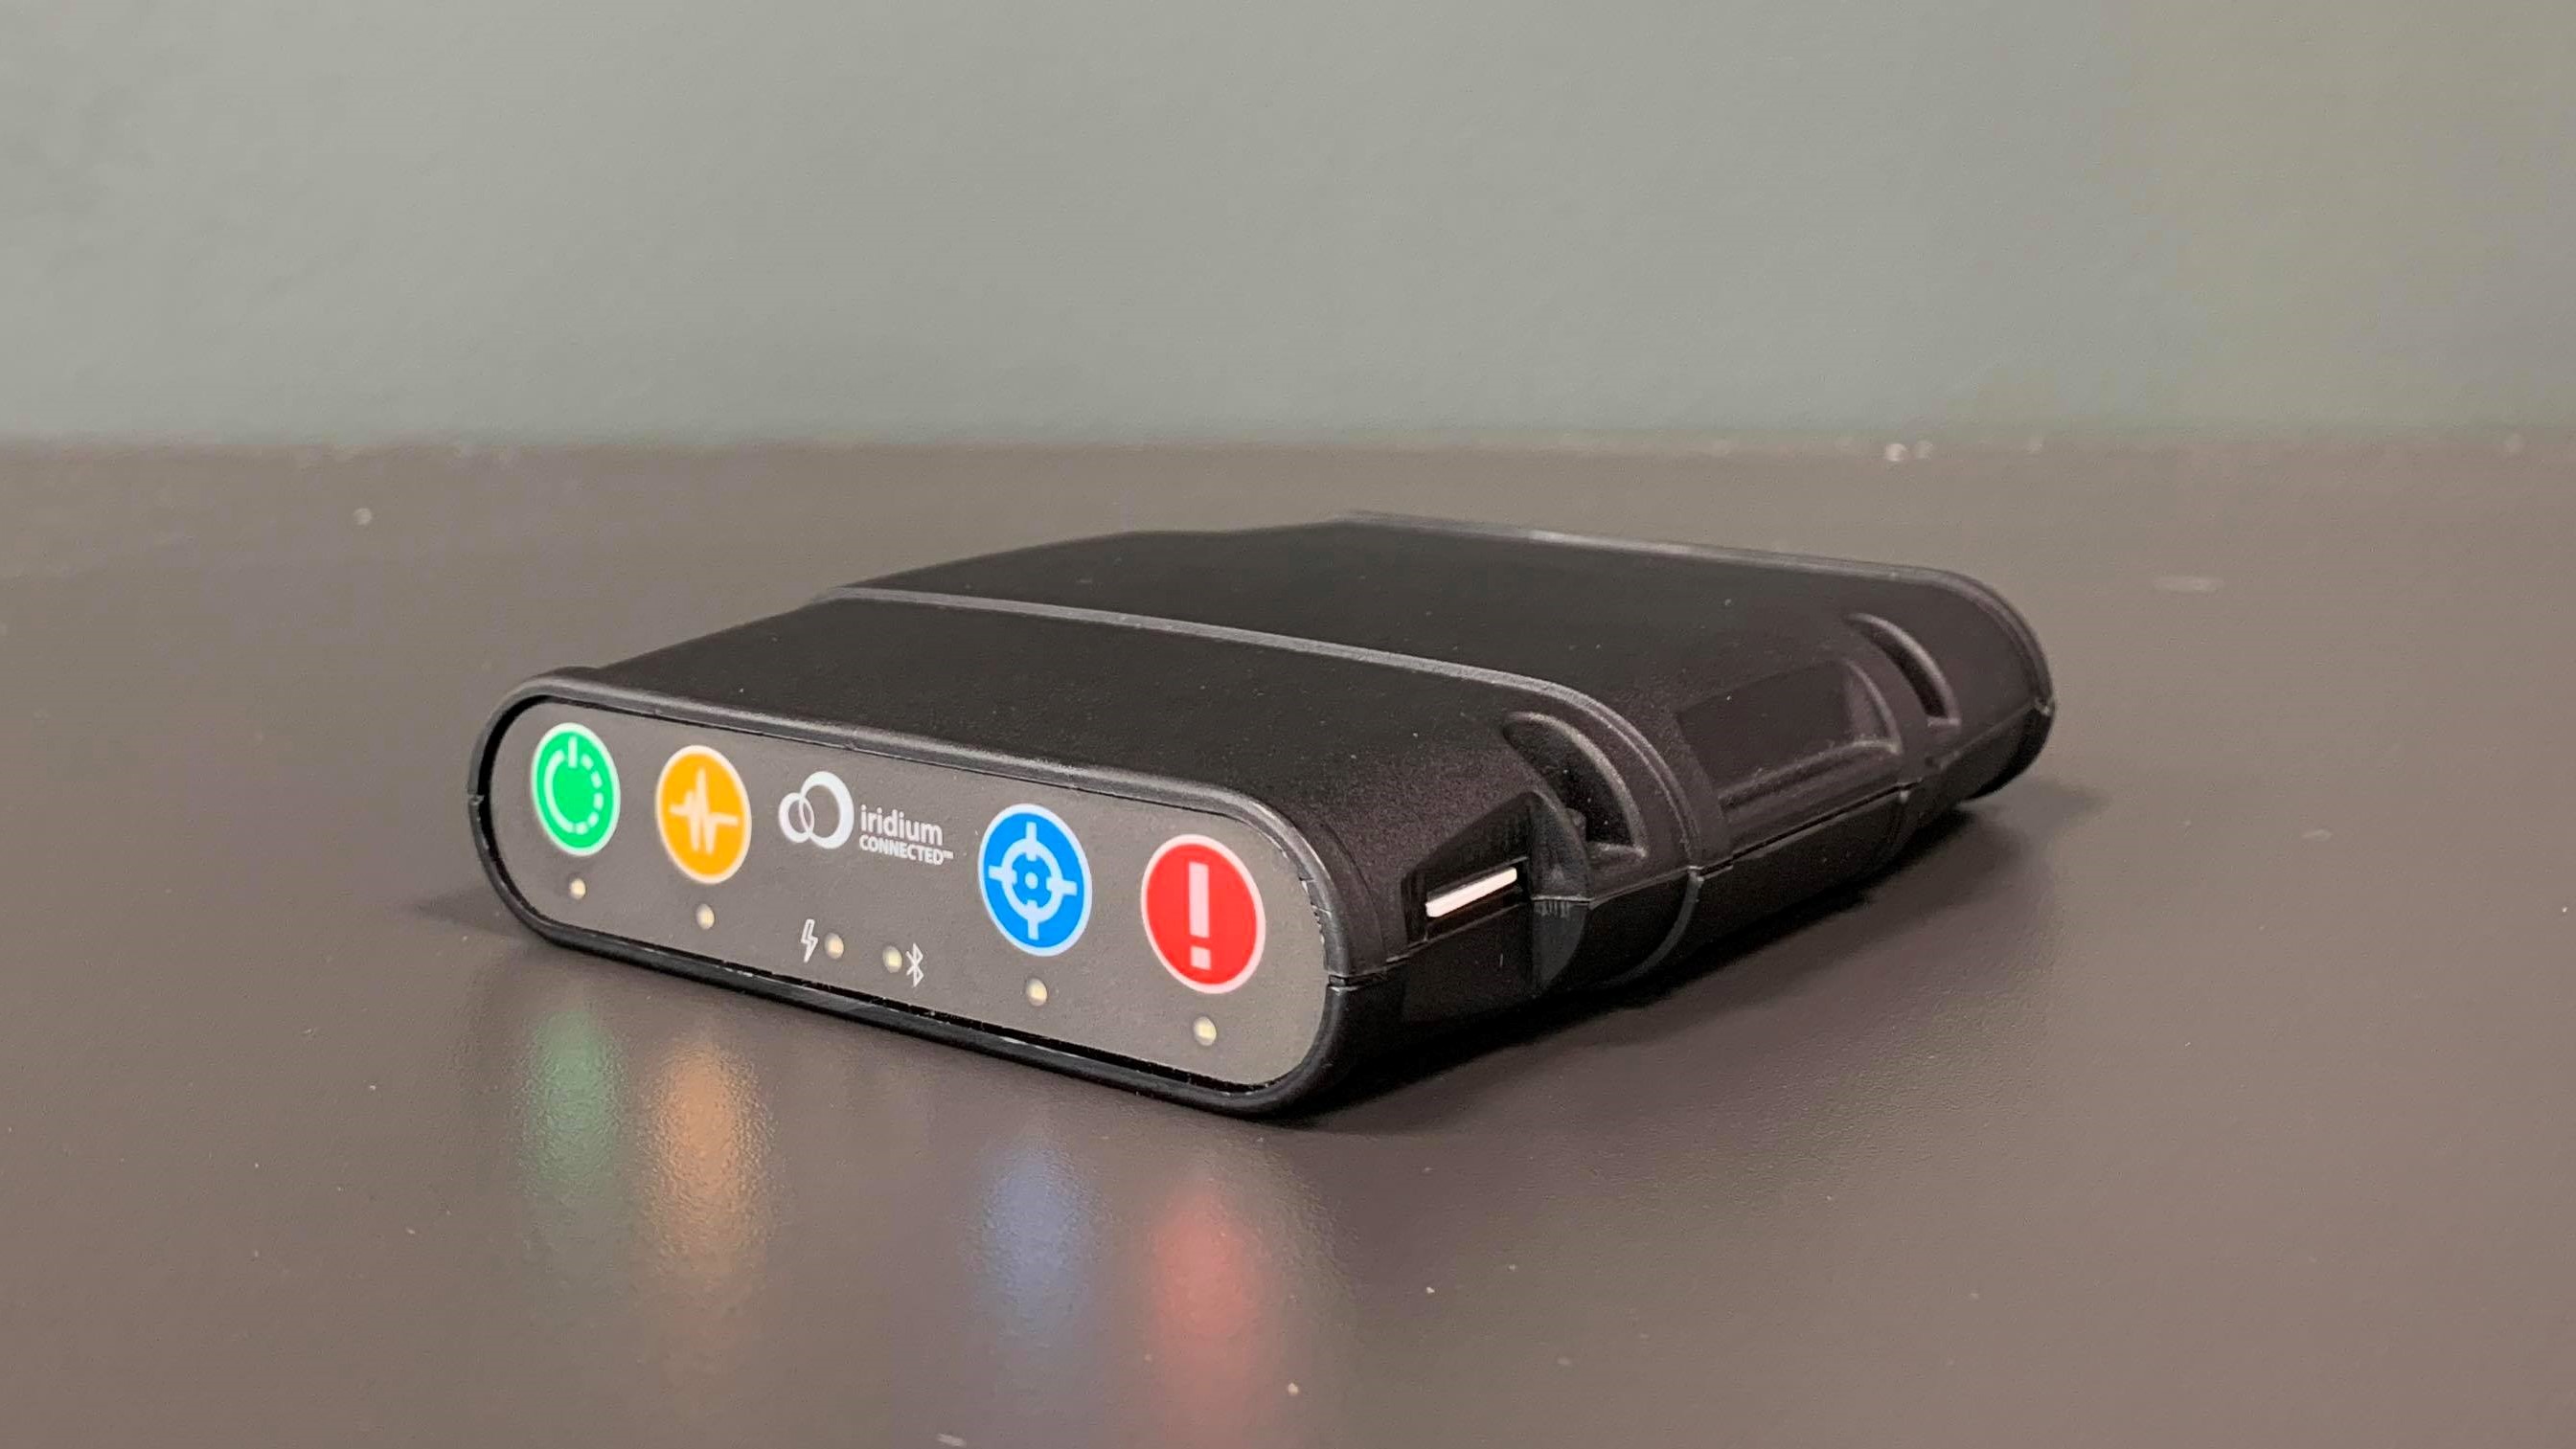
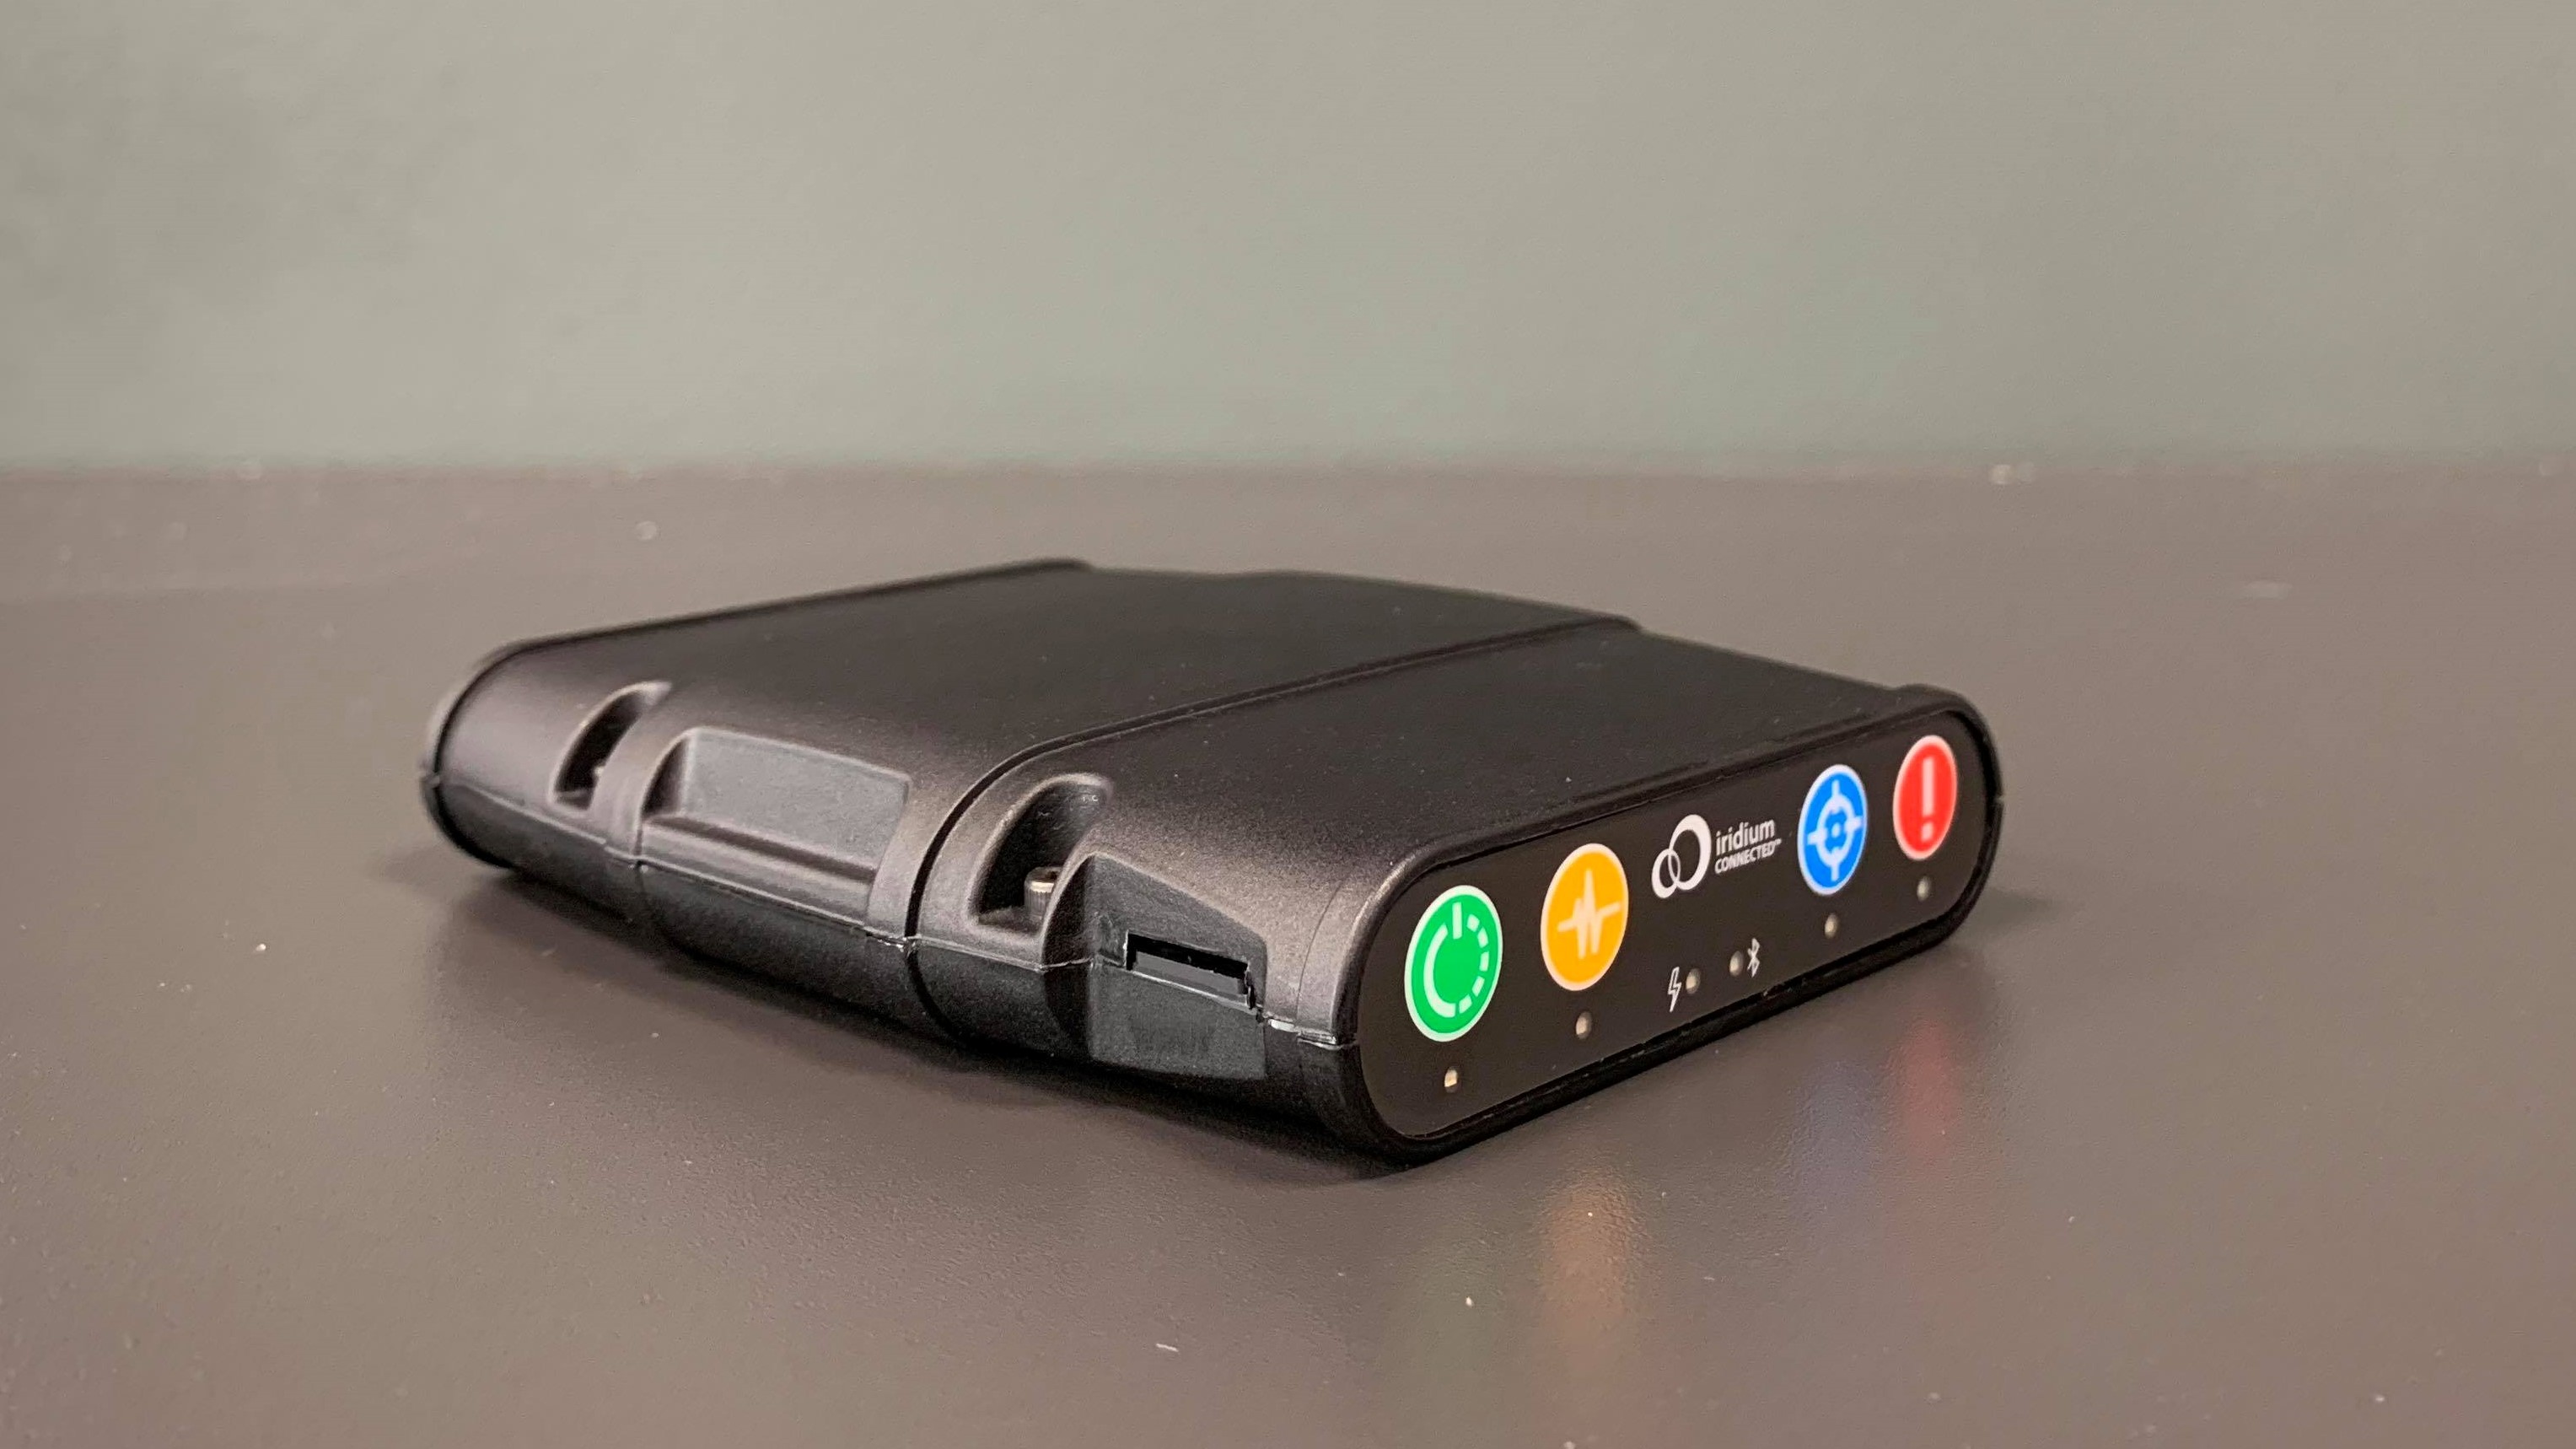
Buttons, LEDs and Slots

The RockAIR - Buttons and LED's
Button 1: Activate / Deactivate / Suspend
To activate the device and start sending position reports, press and hold the power button (Button 1) for 2 seconds. The LED will light up, and will show a solid green light to indicate your unit is active and tracking is enabled.
To deactivate the unit, press and hold the power button for 2 seconds again. The Power LED will turn off, indicating that the unit is now deactivated. When deactivated, no position reports, waypoints or messages will be sent.
Suspend Tracking
Tracking can be suspended with a short press of the power button. When tracking is suspended, the LED will flash quickly - to resume tracking, press the power button again, and the LED will show a solid green light.
Note
When tracking is suspended, no routine tracking positions will be sent - however, you can still send alerts and waypoints (see 2 & 3 below).
Auto Resume
While tracking is suspended, RockAIR can automatically resume tracking once it has travelled a set distance (2km, 3km, 5km or 10km) from the suspension point using the Auto Resume setting. This can be configured in the connect app, in CORE's Airborne Settings or with the autoResumeRadius config option via the API.
Button 2: Watch Mode
Watch Mode will ensure an automatic alert is raised if your provider decides your activity is abnormal (irrespective of whether you raise a manual SOS). Different providers may monitor activity in different ways - for example, some may only alert if tracking data stops being reported for a certain amount of time, others may employ more sophisticated monitoring such as altitude level drops and extreme bank/roll monitoring. Please speak to your provider to determine what activity is monitored when you enable Watch Mode.
To activate Watch Mode, press the Watch button (Button 2). The LED will start flashing quickly. At this point the RockAIR is sending a message to your provider, requesting that you wish to be ‘watched’, and awaiting confirmation that their system has received your watch request.
Once RockAIR receives confirmation from your provider, the Watch button LED will show a solid green light. You are now actively being watched, and if routine tracking information stops being sent, an automatic alert will be raised.
To deactivate Watch Mode, press and hold the Watch button for 2 seconds. The LED will start flashing slowly. At this point the RockAIR is sending a message to your provider, requesting that you do not wish to be ‘watched’ any longer, and is awaiting confirmation that their system has received your ‘stop watch’ request.
Once RockAIR receives confirmation from your provider, the LED will turn off. You are now back in Normal Operating Mode, and your provider is not actively monitoring your transmissions.
See Alert Basics for information about other alert types.
Button 3: Waypoint/Mark
Sometimes you may wish to mark an interesting spot or waypoint for later review. The RockAIR enables you to do this easily by using the Mark button.
Pressing the Mark button will make all four LED button lights flash, requiring you make a choice of which ‘type’ of waypoint you wish to mark (1, 2, 3 or 4). If you press button 1, then the point will be registered as type 1. Your provider will display these waypoints on the mapping for later review.
Examples of waypoint types can be, for example, oil wells, beehives, fires and other points depending on your mission.
Once a waypoint type has been chosen, a GPS fix will be taken at your current location and sent, along with the waypoint type, to your provider for later review on the Core's web interface.
Button 4: SOS Alert
Sending an Alert
Pressing the red Alert button will trigger an alert message to be sent to your provider, and the LED will flash constantly indicating your RockAIR unit is now in Alert Mode.
Depending on the arrangements you have with your provider, this may alert your own predefined first responders, or emergency services. Check with your account manager if you are unsure who will be alerted in the event of an Alert button press.
Note
Whilst in Alert Mode, your RockAIR will be transmitting tracking information based on your 'Distress Profile'
Cancelling an Alert
If you have inadvertently set off an alert, you can send an alert cancellation message. To cancel your alert, you can either:
- Press and hold the alert button for 4 seconds
- Deactivate your RockAIR unit (see button 1)
See Alert Basics for more information on the other alert features available on the RockAIR.
Depending on the arrangements you have made with your provider, this may completely cancel the alert automatically, or you may still be required to take further action to confirm you are safe and the alert was accidental - please check with your account manager if you are unsure.
Reset
In rare situations, you may be requested by support staff to perform a ‘hard reset’ of your RockAIR unit. To do this, hold down the Power button (button 1) for 8 seconds.
When the unit has been successfully reset, all of the lights will flash 3 times and RockAIR will beep to indicate that it's ready for use again. Resetting can take up to 60 seconds after the buttons have been released.
Power LED
The power LED (5) is lit or flashes according to the following modes:
- Intermittent green flash - running on battery power
- Solid green - using external power
- Typically indicates that the tracker is switched off. No illumination of the power LED may also indicate that the tracker is in Shipping mode, Stealth mode or that the battery has run out and the tracker is not connected to external power
Brightness adjustment
Depending on your installation, you may wish to adjust the brightness of the LED indicators.
Press and hold the Watch and Mark buttons (button 2 and button 3) for 2 seconds. All of the LEDs on the keypad will light up.
You can then use the Watch button to cycle through the five different brightness options.
When you have chosen the most suitable setting, press any of the three other keys (‘Power’, ‘Mark’ or ‘Alert’) to go back to normal operating mode. The LEDs will go back to their previous states, at the new brightness setting.
SIM Slot
The SIM slot can be accessed by removing the protective plastic covering of the RockAIR. To access the SIM card, push it in slightly with your finger as in any cellular enabled device. This will trigger the unlocking mechanism which then pushes the card out.

RockAIR SIM Slot
SD Card Slot
The SD card slot can be accessed by removing the protective plastic covering of the RockAIR. To access the SD card, push it in slightly with your finger as in any cellular enabled device. This will trigger the unlocking mechanism which then pushes the card out

RockAIR SD Slot
Updated about 1 year ago
